Using NextGen Gallery & Image Resizer
September 29, 2015
CONSUME CREATIVELY
This content is available in:
This content is available in:
TEXT
Ever seen a website with god-awful photo displays and wonky image sizing? The sad truth is, many of us have. Nothing ruins good content faster than bad images. Luckily, we have tools called NextGen Gallery and Image Resizer to make sure you have full control on the size and placement of your website’s images.
NextGen Gallery is a great tool for managing your website’s images. It is a WordPress plugin that handles the essentials of adding images and galleries, managing existing images, adding images to albums. Image Resizer is a simple tool that allows one to resize images to fit correctly into parts of their website. So what’re you waiting for? Let’s get started.
Uploading Images
Uploading images onto the NextGen gallery starts from your website’s WordPress dashboard.
- Scroll down until you locate the sidebar item titled Gallery.
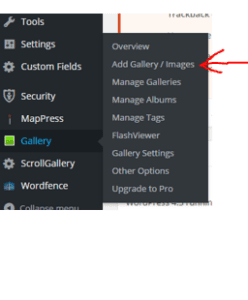
2. Scrolling your mouse over Gallery will open up a separate side menu with a few different options. You will want to select Add Gallery/Images.
After selecting Add Gallery/Images you will be brought to the page that will allow you to upload images. There are a few things you can do from this page. First, you can make an entirely new gallery (something that will be covered shortly) or you can add an image(s) to an existing gallery.
3. To upload an image(s) to an existing gallery, simply select the appropriate gallery from the drop down menu and select Add Files. This will open a window in which you can select your desired image(s) from your computer. Select Open once you have selected your image(s) and they will be added into the selected gallery.

 4. Once your image(s) has been added, they will be listed in the box below the Gallery drop down menu. Review the list, then select Start Upload when you are ready to upload the images and to officially have them in your gallery.
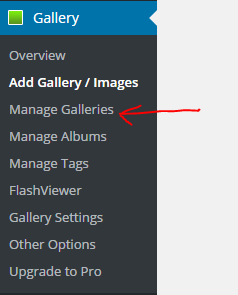
 To review the images you have uploaded into your galleries, select the Manage Galleries option that is below the Gallery section of your WordPress dashboard.
Adding Galleries
Adding a gallery is a good way to keep your images organized and easily accessible. To do this, we scroll over the “Gallery” tab on our WordPress dashboard.
1. Scrolling over Gallery will display a list of options. You will want to select Add Gallery/Images.
2. From this page, you can simply select the drop down menu entitled Create a new gallery and type in your desired Gallery name in the box to the right of the drop down menu.
3. After you have entered your desired name for the gallery, select Add Files and add the image(s) that belong in the gallery. Once these have been added, select Start Upload to upload the image(s) to the selected gallery. You can view the galleries you have created by selecting the Manage Galleries option that appears below the Gallery category on your WordPress Dashboard.
Resizing Images
We use a simple and effective tool for resizing images called “Image Resizer for Windows”. If you have a Mac, we recommend downloading “ResizeIt” from the App store. For now, we’ll focus on Image Resizer for Windows.
You can find a free download for Image Resizer by visiting Image Resizer.
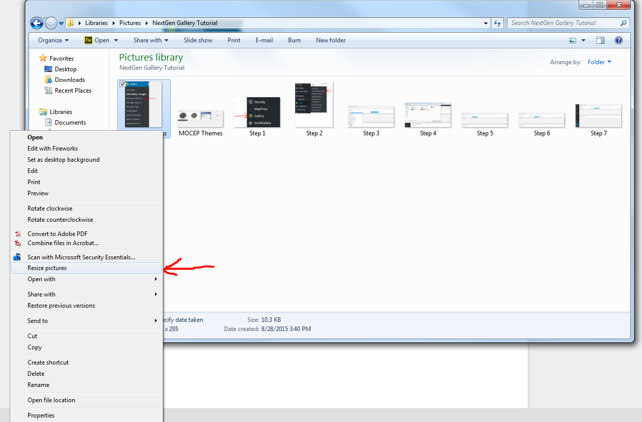
After downloading the application, using it is simple. You can right click on any saved image on your computer and select Resize pictures.
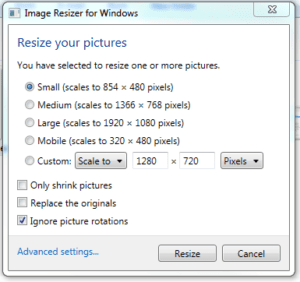
Selecting Resize pictures on the image you would like to edit will bring you to a page that looks like this:
From here, you simply select the size you would like your image to become. You have the pre-set options of Small, Medium, Large, and Mobile as well as an option to resize the image to your custom preference. It is good practice to save your original image in case you want to go back and edit it again. We suggest not selecting the “Replace the originals” box. We don’t select the “Only shrink pictures” box because in some cases we may be wanting to make our images larger.
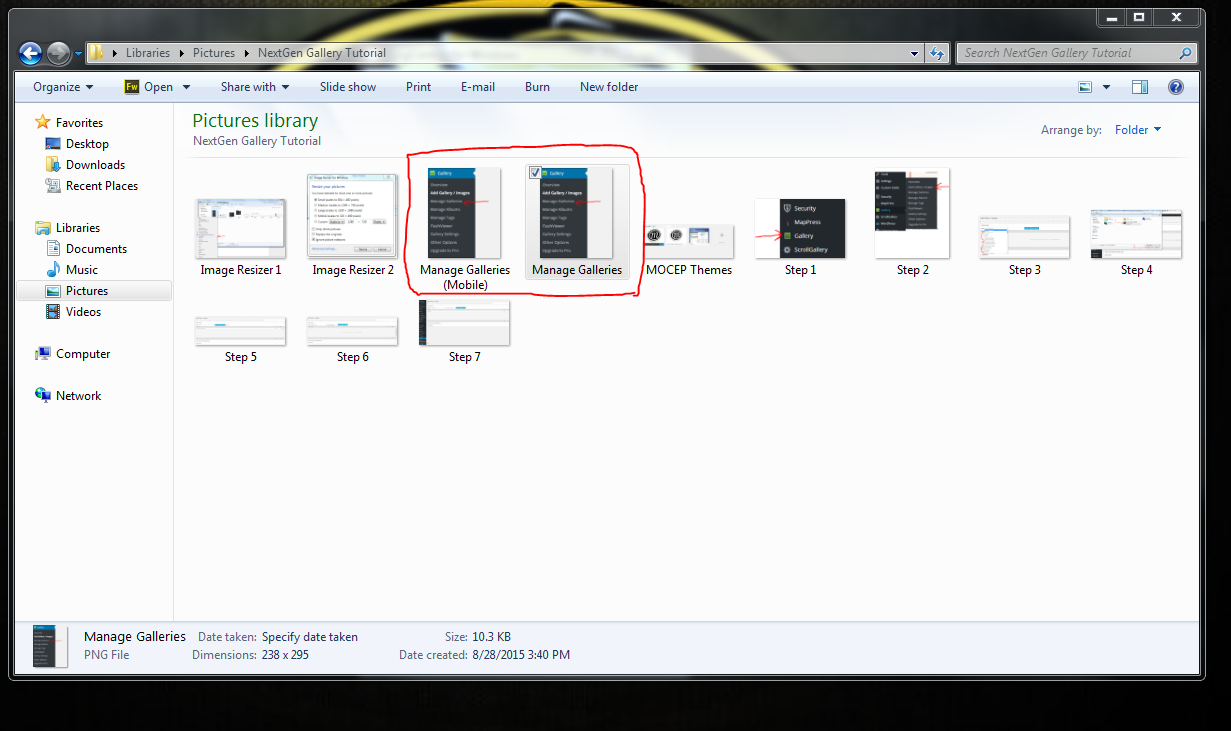
Once you select Resize, your newly sized image will be saved to the folder that the original image was taken from. You’ll notice that the resized image will have the same name as the original photo, with an added description after that says how the image was resized. In this example, it is called “Manage Galleries (Mobile)” because I selected the image to be resized to Mobile.
You’re ready to make your own NextGen gallery now!
With NextGen and Image Resizer, you have the ability to manage your galleries and images and resize images to your liking. Hopefully this tutorial has broadened your understanding of these useful applications. If you need help, just let us know! We are always happy to assist!
Who Manifested This Madness?

This fabulous human, that's who.
Monica Maye Pitts
Monica is the creative force and founder of MayeCreate. She has a Bachelor of Science in Agriculture with an emphasis in Economics, Education and Plant Science from the University of Missouri. Monica possesses a rare combination of design savvy and technological know-how. Her clients know this quite well. Her passion for making friends and helping businesses grow gives her the skills she needs to make sure that each client, or friend, gets the attention and service he or she deserves.


